Monday, February 6, 2017

10 words animation

10 words animation

what was the processes 

we made a animation of 10 words that would best describe me. so some examples of words would be like hard worker, outgoing, and social. so after I found 10 words that would describe me we had to find a background image that would be related to you. as you can see i chose the moon because i like outer space and mysterious things like the moon. after the steps listed we had to color the words we chose using colors from the background. then came the animation part we animated the words to do special things like flips and fading in and out. 

what did i learn 

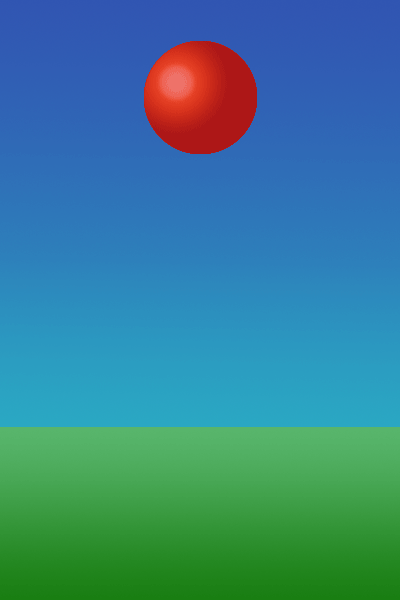
I learned how to select a color from the background, this was cool because now the words look like they could blend in from the background. I also learned how to use the video editor, to make video animations. i also learned that it is allot harder to make animated movies than it looks because i had troubles animating 10 words moving across a screen, I also learned that animation is really hard sometimes, like the bouncing ball was more easy for me than this animation.

takeaways for next time 

the first two or three days of this animation project i was sick, so next time i should learn not to get sick. so because i was out two to three days next time we do this type of animation i will make the it go allot slower, this animation goes by really fast and i realized this when i put the animation on youtube. I did not know that we had to make the animation longer than the given area in photoshop. I also will maybe look longer for a better background wth maybe a little more color, I felt like this image of moon only had like three really different colors.

Wednesday, January 25, 2017

bouncing ball #2

summarize the project 

                    our project was to make a new bouncing ball project. In our class we have already made a bouncing ball, but that was not as realistic as a real ball bouncing from point A to point B. So we first made some arcs that helped us see where the ball would bounce. then after that we gave the ball a face so that we could see how much of a squash and strech the ball would have. then we had to do the transformations on the ball and have a over exageration on the ball. 

what did you learn that is new 

                     i learned that disney had a really hard time having to make all of those slides by hand. we used the fade in and fade out in some of our slides but walt disney crew had to draw all of this by hand. I also learned that you have to really go slow at the top to make a good effect on the ball. also learned that in animation allot of what they use is all forms of arcs from that video we watched.

what did you think about how it went 

                      I thought that the entire project went good there where sometimes that i would get the slides mixed up. then i would have to fix them and it took a while to get the correct slide in the correct spot. the only real problem that i had is that i put my entire project into a art board and then it would not save for web because the file was to big. other than these things i think that bouncing ball #2 was a really fun and i want to move to the next project.

Wednesday, January 11, 2017

Bouncing ball Animation

the big steps
       the big or main steps into the bouncing ball animation are making the ball,background, and making it look 3 demential. and the animating part these are the main big things to creating a animating ball. T hardest thing that i thought was the gradient tool. It seemed hard to change the gradients to the correct light fixtures and make it look good. the last main big step would be the moving the ball, as in making the balls quash and stretch and make it look like a ruer ball bouncing up and down 
something new 

something that i learned that is new is the gradient tool in graphic design I never use the gradient tool, that might be why it was so hard for mr to get the correct coloring and i could not add in anything like clouds or a sunset. And the other new thing I learned was the time line I thought that the timeline was really cool and easy to learn. Also new is the GIF and how to pronounce GIF I thought that that was neat.
how did it go 

I think that the gradient tool is the hardest and I don't really know why it was so hard for me to do it just was. the other thing that I thought would be really hard is having to make allot of different frames but really it was 1/2 way of duplications, I thought that the duplications are really cool that it made the work time cut in half. Other than all of the other things listed I think that animation is a fun class and i want to see the next project and have new things to learn.

Monday, December 19, 2016

e9 Quarter 2 reflection 
                
 I have learned that i graphic design I like to mess around with all of the different art tools and I can make some really cool looking designs using the tools. I have also learned that I am very artistic and like to make my work look perfect. 
                
                I definentaly need improvement with the pen tool I never really used the pen tool because I did not know how to use that. but if I do graphic design next year I will defiantly use the pen tool more than this year.

               What I loved most about this quarter is the cool designs and learning about the different graphic design logos that are surrounding us in our everyday life and what they mean.

               what I would change differently is more communication with others I am just really quiet so I think that I should just talk to people more and answer some questions or raise my hand.

                I have learned about adobe illustrator and adobe dream weaver these seam pretty basic answers but I really did learn allot bout these two things and hope to do them next year.
   
              one of my goals is to make my work better than this year or add change to them because I feel like I can make them better and do more with the logos that I have made.
          
Final-web Design 
                        
                     To make a website in adobe dream weaver you first have to have the documents that you want in your site to be in a file together. A example of this would be that I have a headshot.jpeg file in the same folder as my home.html. All of these files will make sense if you have ever used dreamweaver. the Final process is to import every thing that you want to be in your website. After that then what islet is just making your site look the way you want it to. 

                      For me the dreamweaver process took along time. I thought that it was really complicated to do some of the things to make a site. but if you have a really good teacher that knows how to help you the process goes by really quickly. I personally used my time to the best of my ability. I stayed on task as much as I could before getting distracted, I think that this helped me the most.
                      Challenges that i faced was the computer. for some reason my computer would not connect to the server so that was a big complication. I thought that I found a way around that but without the server I cannot import a video. the other part of the challenge was that i could not go to youtube and import the videos I made on there. This is probably what set me behind like a entire day or I would be finished.
                     
                       I learned that while using dreamweaver you have to make your time and go slow. Otherwise you might have to restart the videos like I did. And also that making web site is a lot harder than it looks.
                      
                      I thought that the web design is fun and that it was a good learning experience but I liked graphic design allot more than web design. And I also thought that without experience web design can be the hardest subject in school, other than the things listed I have had a fun quarter.
            
                      I did not get my website compleated

Friday, December 9, 2016

presentation blogg

                     In our Class we learned about how to put together a good presentation. some important things to a good presentation is The importance of professional appearance, facial expression, loud voice, eye-contact and posture. You obviously want to be wearing your good cloths and not the shirt from Walmart  Two important parts of a presentation is facial expression and loud voice. these are some obvious things but allot of people won't do these simple steps. The last two things are eye-contact and posture. Don't slouch around and make good eye contact are simple but hard to remember.

                      we watched 3 Ted presentations of Bill Gates, Bjorn Lomberg, and Jamie Oliver. our job as the class was to be the judge. Our job as the judge was to decide who had the best presentation skills,The importance of professional appearance, facial expression, loud voice, eye-contact and posture. I though that people like bill gates would be almost as a perfect person and would not have any flaws. But bill gates didn't really have a new smile and wasn't dressed as well as the other people 

                    when i was in front of the class I noticed some things about how I would move allot and didn't use that much gestures so i could work on doing some better gestures. other than speaking I think that i did good for coming up with a mini presentation on the spot.

Monday, December 5, 2016

illustrator logo 

                       on this project we first had to create a sketch of 3 different logos once we made the different logos we then had to choose the one we liked the most. Once we got the logo we like the most we made that logo on a new piece of paper. The logo had to fill the entire screen, and have a explanation on why we chose that logo. I chose my logo because of colors that it had, my logo had green and gold so I thought that looked cool. My logo also had a hidden message in it, if you turn my logo on its side than you see a letter N for Nathan. I thought that the hidden message was something that allot of other people would not have in their logo.